

Repository: https://github.com/Light-it-labs/laravel-livewire-cart
Developers may have a hard time adapting to the frontend environment. There are several challenges, for example learning how to work with a new library for the construction of interfaces, such as ReactJs, VueJs or simply Javascript. It’s good for developers to have experience in these technologies, though they have a logarithmic learning curve.
It’s for this reason that this time I bring you a guide to a framework for Laravel that is trending at the moment: Livewire.
What’s Livewire?
It comes as an attractive solution for developers since it allows building user interfaces as PHP components without the need to use reactive javascript.
Livewire is defined as a full-stack framework for building dynamic interfaces. With this framework you can build user interfaces through PHP classes, which allows backend developers to work in an environment they are used to work in.
How does it work?
When we visit a page, in the first load of the interface, Livewire is responsible for rendering the component as a simple blade and injecting the HTML result to the requested page.
Then the magic happens, every time actions are triggered due to user interactions with the interface, requests (AJAX) are executed, which returns the rendered HTML with the corresponding changes. Then it is again injected into the page.
Finally, the library automatically detects the changes that need to be done to the DOM, updating only what’s necessary.

The challenge
We will venture into the implementation of a product catalog, which will have a simple shopping cart for checkout. It will also be able of adding and removing products from it. The objective is to understand how it works and the most important characteristics of this package.
Enough with theoretical aspects… let’s get to work!
First of all we will initialize a Laravel project from scratch. To do this, we execute:
composer create-project --prefer-dist laravel/laravel laravel-livewire-exampleThe next step is to configure the project. First, you should configure the .env file and then install and configure livewire.
composer require livewire/livewireAfter finishing up these first two stages, we will create the product’s entity with its model, migration, factory and data seeder. This is how we obtain fake data to run tests with the project. Then, execute the following command:
php artisan make:model -msf Product
- m | creates migration
- s | creates seeder
- f | creates factory
Now it’s time to update the content of the files created by the command:
<?php

use Illuminate\Database\Migrations\Migration;
use Illuminate\Database\Schema\Blueprint;
use Illuminate\Support\Facades\Schema;

class CreateProductsTable extends Migration
{
    /**
     * Run the migrations.
     *
     * @return void
     */
    public function up()
    {
        Schema::create('products', function (Blueprint $table) {
            $table->id();

            $table->string('name');
            $table->string('description');
            $table->float('price');

            $table->timestamps();
        });
    }

    /**
     * Reverse the migrations.
     *
     * @return void
     */
    public function down()
    {
        Schema::dropIfExists('products');
    }
}
database/migrations/xxxx_xx_xx_xxxxxx_create_products_table.php
<?php

/** @var \Illuminate\Database\Eloquent\Factory $factory */

use App\Product;
use Faker\Generator as Faker;

$factory->define(Product::class, function (Faker $faker) {
    return [
        'name' => $faker->word,
        'description' => $faker->text(180),
        'price' => $faker->numberBetween(50, 100)
    ];
});
database/factories/ProductFactory.php
<?php

use App\Product;
use Illuminate\Database\Seeder;

class ProductSeeder extends Seeder
{
    /**
     * Run the database seeds.
     *
     * @return void
     */
    public function run()
    {
        factory(Product::class, 50)->create();
    }
}
database/seeds/ProductSeeder.php
<?php

use Illuminate\Database\Seeder;

class DatabaseSeeder extends Seeder
{
    /**
     * Seed the application's database.
     *
     * @return void
     */
    public function run()
    {
        $this->call(ProductSeeder::class);
    }
}
database/seeds/DatabaseSeeder.php
Thanks to these changes we are ready to execute the next command while having data to work with.
php artisan migrate:fresh --seedIf everything was correctly executed, this message should appear at the end of the console: "Database seeding completed successfully."
In this case, we’ll manage the state of the shopping cart with a Laravel session. We’ll create a facade that manages it using basic operations to obtain, add and remove products. I won’t explain how to configure a facade in Laravel because it’s not part of the guide’s objective. Our facade should look like this:
<?php

namespace App\Helpers;

use App\Product;

class Cart
{
    public function __construct()
    {
        if($this->get() === null)
            $this->set($this->empty());
    }

    public function add(Product $product): void
    {
        $cart = $this->get();
        array_push($cart['products'], $product);
        $this->set($cart);
    }

    public function remove(int $productId): void
    {
        $cart = $this->get();
        array_splice($cart['products'], array_search($productId, array_column($cart['products'], 'id')), 1);
        $this->set($cart);
    }

    public function clear(): void
    {
        $this->set($this->empty());
    }

    public function empty(): array
    {
        return [
            'products' => [],
        ];
    }

    public function get(): ?array
    {
        return request()->session()->get('cart');
    }

    private function set($cart): void
    {
        request()->session()->put('cart', $cart);
    }
}
Cart.php
Now that our facade is configured properly we can start developing our catalog. We’ll be using TailwindCSS to structure and style the application. In order to add this dependency we will follow the following steps:
npm install tailwindcss
npx tailwind init
npm install
npm run watch
Now we should modify the following file by adding the Tailwind’s directives:resources/sass/app.scss
@tailwind base;
@tailwind components;
@tailwind utilities;
Finally, we import tailwind to the project in the next file:
const mix = require('laravel-mix');

mix.js('resources/js/app.js', 'public/js');

const tailwindcss = require('tailwindcss')

mix.sass('resources/sass/app.scss', 'public/css')
    .options({
        processCssUrls: false,
        postCss: [ tailwindcss('tailwind.config.js') ],
    })
webpack.mix.js
We now need to define our layout. Livewire will automatically search for a layout named app.blade.php and render the components by default where we define the content section:
<!DOCTYPE html>
<html>
    <head>
        <meta charset="utf-8">
        <meta name="viewport" content="width=device-width, initial-scale=1">
        <title>Laravel</title>
        <link href="{{ asset('css/app.css') }}" rel="stylesheet">

        @livewireStyles
    </head>
    <body>
        <div class="mx-auto">
            @yield('content')
        </div>

        @livewireScripts
        <script src="{{ asset('js/app.js') }}"></script>
    </body>
</html>
resources/views/layouts/app.blade.php
To ease the access to the different views, we should add a navigation bar and create a new file called resources/views/layouts/header.blade.php with the following content:
<nav class="flex items-center justify-between flex-wrap p-6 mb-6 shadow">
    <div class="block lg:hidden">
        <button class="flex items-center px-3 py-2 border rounded text-teal-200 border-teal-400 hover:text-white hover:border-white">
            <svg class="fill-current h-3 w-3" viewBox="0 0 20 20" xmlns="http://www.w3.org/2000/svg"><title>Menu</title><path d="M0 3h20v2H0V3zm0 6h20v2H0V9zm0 6h20v2H0v-2z"/></svg>
        </button>
    </div>
    <div class="w-full block flex-grow lg:flex lg:items-center lg:w-auto">
        <div class="text-sm lg:flex-grow">
            <a href="/" class="block mt-4 lg:inline-block lg:mt-0 mr-4">
                Home
            </a>
            <a href="/products" class="block mt-4 lg:inline-block lg:mt-0 mr-4">
                Products
            </a>
            <a href="/cart" class="block mt-4 lg:inline-block lg:mt-0 mr-4">
                Cart
            </a>
        </div>
    </div>
</nav>
resources/views/layouts/header.blade.php
It’s necessary to update the layout and integrate the header. The layout file should be seen like this:
<!DOCTYPE html>
<html>
    <head>
        <meta charset="utf-8">
        <meta name="viewport" content="width=device-width, initial-scale=1">
        <title>Laravel</title>
        <link href="{{ asset('css/app.css') }}" rel="stylesheet">

        @livewireStyles
    </head>
    <body>
        @include('layouts.header')

        <div class="mx-auto">
            @yield('content')
        </div>

        @livewireScripts
        <script src="{{ asset('js/app.js') }}"></script>
    </body>
</html>
resources/views/layouts/app.blade.php
Now we’re ready to start creating components with Livewire. We’ll start creating a component for the home interface, in which we want to show a welcome message.
To do this, we will execute the command php artisan make:livewire Home which will automatically add two new files in the project. The first one contains all the logic of the components and the other one contains all the HTML linked to it. It’s worth mentioning that this last one is a blade file, so we can use the same blade directives we’re used to using in Laravel.
The views files are in resources/views/livewire , we must add content to the file home.blade.php within the existing route tag <div>.
! Don’t forget that the blade file must have only one root element.
<div>
    <p class="text-center p-6">
        <span class="text-4xl">Welcome!</span>
    </p>
</div>
resources/views/livewire/home.blade.php
The next step is to modify the route’s answer so that Livewire can take control of the route and render the component within the section ‘content’ defined in the layout.
Let’s now modify the file web.php, it should be seen this way:
<?php

use Illuminate\Support\Facades\Route;

Route::livewire('/', 'home')->name('home');
routes/web.php
! Livewire’s library automatically searches for a component named home within the directory app/http/livewire
If we now run our project with php artisan serve and access to http://localhost:8000 this is what we’ll see:
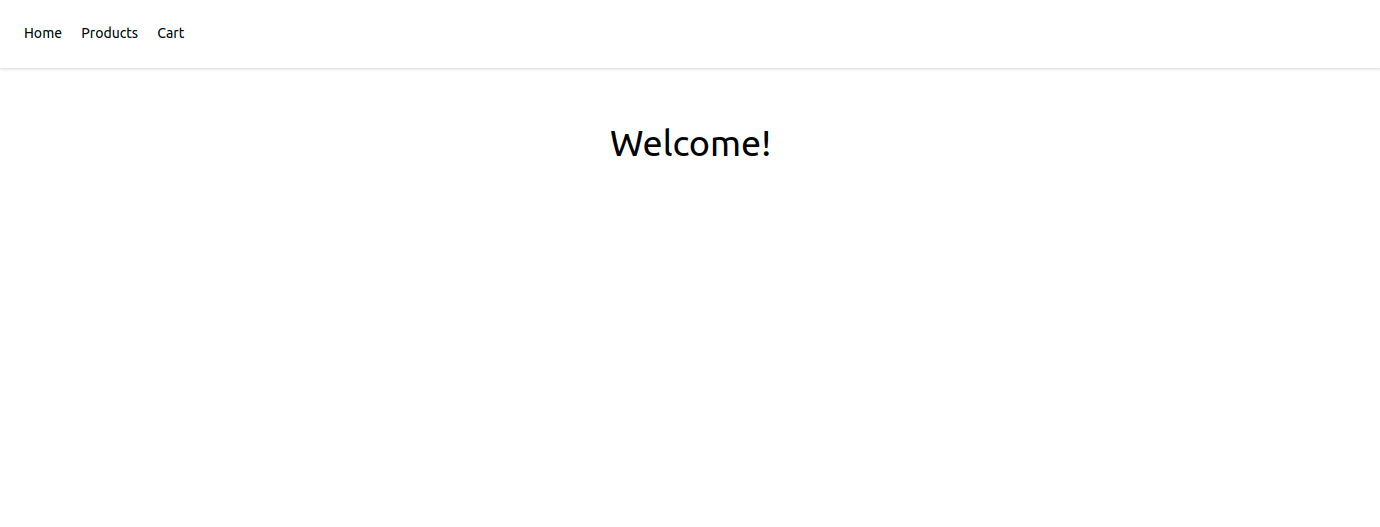
If you can see this view, you’re on the right track! You can now move forward to the construction of our product catalog. We’ll again create a Livewire component with this command:
php artisan make:livewire Products
The ‘Products’ component will have the following content:
<?php

namespace App\Http\Livewire;

use App\Product;
use App\Facades\Cart;
use Illuminate\View\View;
use Livewire\Component;
use Livewire\WithPagination;

class Products extends Component
{
    use WithPagination;

    public $search;

    protected $updatesQueryString = ['search'];

    public function mount(): void
    {
        $this->search = request()->query('search', $this->search);
    }

    public function render(): View
    {
        return view('livewire.products', [
            'products' => $this->search === null ?
                Product::paginate(12) :
                Product::where('name', 'like', '%' . $this->search . '%')->paginate(12)
        ]);
    }

    public function addToCart(int $productId): void
    {
        Cart::add(Product::where('id', $productId)->first());
    }
}
Here we will see functions with different objectives. The ‘mount’ function will always be executed before the ‘render function’. It’s where we should define the logic that involves the data that will be rendered later.
The ‘render’ function is in charge of rendering the blade file. It’s executed the first time the page is loaded and every time there’s an interaction with the page (whenever a user interacts with the different visual components).
We also have the ‘addToCart’ function, which can be called from the view. For example: On a button click.
The content of the view is:
<div>
    <div class="w-full flex justify-center">
        <input wire:model="search" type="text" class="shadow appearance-none border rounded w-1/2 py-2 px-3 text-gray-700 leading-tight focus:outline-none focus:shadow-outline" placeholder="Search products by name...">
    </div>

    <div class="w-full flex justify-center">
        <div class="flex flex-col md:flex-wrap md:flex-row p-5">
            @foreach ($products as $product)

                <div class="w-full md:w-1/2 lg:w-1/3 md:px-2 py-2">
                    <div class="bg-white rounded shadow p-5 h-full relative">
                        <h5 class="font-black uppercase text-2xl mb-4">
                            {{ $product->name }}
                        </h5>
                        <h6 class="font-bold text-gray-700 text-xl mb-3">U$S {{ $product->price }}</h6>
                        <p class="text-gray-900 font-normal mb-12">
                            {{ $product->description }}
                        </p>
                        <div class="flex justify-end mt-5 absolute w-full bottom-0 left-0 pb-5">
                            <button wire:click="addToCart({{ $product->id }})" class="block uppercase font-bold text-green-600 hover:text-green-500 mr-4">
                                Add to cart
                            </button>
                        </div>
                    </div>
                </div>

            @endforeach
        </div>
    </div>

    <div class="w-full flex justify-center pb-6">
        {{ $products->links('layouts.pagination') }}
    </div>
</div>
resources/views/livewire/products.blade.php
As we can see in line 3, the ‘search’ attribute is used as the model in the input. This means that every time a change is made in the input, the component will be updated with the new value of the input. This ends up in the execution of the ‘render’ function once again.
We’ll also use the following layout for the product pagination.
@if ($paginator->lastPage() > 1)
    <ul >
        <li class="{{ ($paginator->currentPage() == 1) ? ' disabled' : '' }} inline border-t border-b border-l border-brand-light px-3 py-2 no-underline">
            <a href="{{ $paginator->url(1) }}"><<</a>
        </li>
        @for ($i = 1; $i <= $paginator->lastPage(); $i++)
            <li class="{{ ($paginator->currentPage() == $i) ? ' text-green-500' : '' }} inline border-t border-b border-l border-brand-light px-3 py-2 no-underline">
                <a href="{{ $paginator->url($i) }}">{{ $i }}</a>
            </li>
        @endfor
        <li class="{{ ($paginator->currentPage() == $paginator->lastPage()) ? ' disabled' : '' }} inline border-t border-b border-r border-l border-brand-light px-3 py-2 no-underline">
            <a href="{{ $paginator->url($paginator->currentPage()+1) }}" >>></a>
        </li>
    </ul>
@endif
resources/views/layouts/pagination.blade.php
It’s time to define the route ‘/products’ to make our component work. To do this, we modify the file web.php.
<?php

use Illuminate\Support\Facades\Route;

Route::livewire('/', 'home')->name('home');
Route::livewire('/products', 'products')->name('products');
routes/web.php
After defining this, if we access to the route /products we’ll obtain the following result:
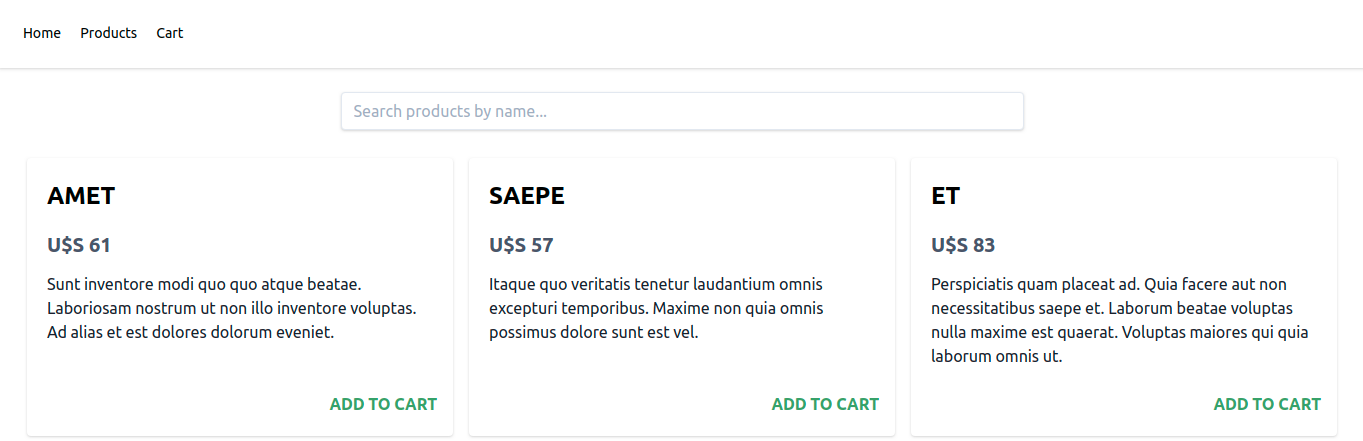
At this point we can filter the products by their name, as well as add them to the shopping cart.
The next step is to create the shopping cart interface. By doing that we’ll be able to see the products, remove them and finish the checkout process. Now execute the following command:
php artisan make:livewire Cart
Add the following content to the files app/Http/Livewire/Cart.php and resources/views/livewire/cart.blade.php
<?php
namespace App\Http\Livewire;
use App\Facades\Cart as CartFacade;
use Livewire\Component;
class Cart extends Component
{
    public $cart;

    public function mount(): void
    {
        $this->cart = CartFacade::get();
    }
    public function render()
    {
        return view('livewire.cart');
    }
    public function removeFromCart($productId): void
    {
        CartFacade::remove($productId);
        $this->cart = CartFacade::get();
    }
    public function checkout(): void
    {
        CartFacade::clear();
        $this->cart = CartFacade::get();
    }
}
app/Http/Livewire/Cart.php
We’ll obtain the status of the shopping cart in the mount() function. This way we’ll be able to show the existing products in the view.
We should define the function ‘RemoveFromCart’, which will be in charge of removing a product (using its ID) from the shopping cart. It’s important to notice that this job is delegated to the facade.
There’s also a function called ‘checkout’ that makes the checkout and removes all the products from the shopping cart.
The view should look like this:
<div>
    <div class="w-2/3 mx-auto">
        <div class="bg-white shadow-md rounded my-6">
            @if(count($cart['products']) > 0)
                <table class="text-left w-full border-collapse">
                    <thead>
                        <tr>
                            <th class="py-4 px-6 bg-grey-lightest font-bold uppercase text-sm text-grey-dark border-b border-grey-light">Name</th>
                            <th class="py-4 px-6 bg-grey-lightest font-bold uppercase text-sm text-grey-dark border-b border-grey-light">Price</th>
                            <th class="py-4 px-6 bg-grey-lightest font-bold uppercase text-sm text-grey-dark border-b border-grey-light">Actions</th>
                        </tr>
                    </thead>
                    <tbody>
                        @foreach($cart['products'] as $product)
                            <tr class="hover:bg-grey-lighter">
                                <td class="py-4 px-6 border-b border-grey-light">{{ $product->name }}</td>
                                <td class="py-4 px-6 border-b border-grey-light">{{ $product->price }}</td>
                                <td class="py-4 px-6 border-b border-grey-light">
                                    <a wire:click="removeFromCart({{ $product->id }})" class="text-green-600 font-bold py-1 px-3 rounded text-xs bg-green hover:bg-green-dark cursor-pointer">Remove</a>
                                </td>
                            </tr>
                        @endforeach
                    </tbody>
                </table>
                <div class="text-right w-full p-6">
                    <button wire:click="checkout()" class="bg-green-500 hover:bg-green-700 text-white font-bold py-2 px-4 rounded">
                        Checkout
                    </button>
                </div>
            @else
                <div class="text-center w-full border-collapse p-6">
                    <span class="text-lg">¡Your cart is empty!</span>
                </div>
            @endif
        </div>
    </div>
</div>
resources/views/livewire/cart.blade.php
This is probably the interface in which we use the blade directives the most. We can verify the existence of products in the shopping cart in the line 4. If they do exist, the elements will be listed. If there are no existing elements, a message will be displayed saying that there are no products in the shopping cart.
Notice that each product is associated with a button. Every time the click event is executed, the function RemoveFromCart - defined in the component - is activated and will remove the element from the shopping cart.
What’s left? Updating the file web.php, which should now be seen this way:
<?php
use App\Http\Controllers\HomeController;
use App\Http\Controllers\ProductsController;
use Illuminate\Support\Facades\Route;

Route::livewire('/', 'home')->name('home');
Route::livewire('/products', 'products')->name('products');
Route::livewire('/cart', 'cart')->name('cart');
routes/web.php
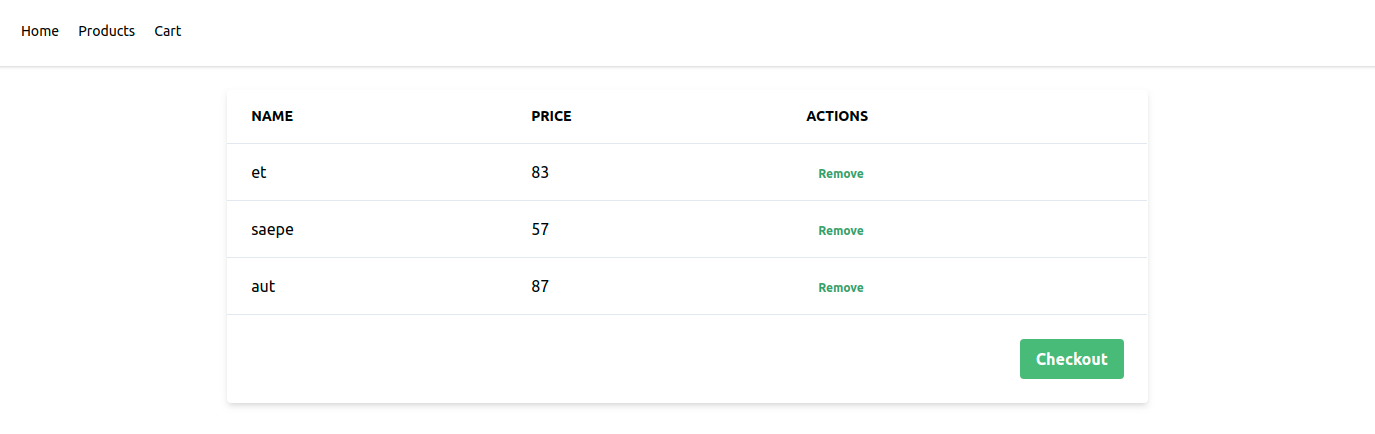
Finally, if we add a product to the shopping cart and access a /cart, we should get to the following view:
Activating the SPA mode
To activate this navigation mode, the first thing we should do is install the turbolinks dependency. This dependency automatically injects the received HTML without reloading the page. To install it, we use: npm install --save turbolinks
After this, we must update the app.js file, which should contain this content:
require('./bootstrap');

var Turbolinks = require("turbolinks")
Turbolinks.start()
resources/js/app.js
Finally, we execute npm run watch
If we head back to our project in the navigator, we'll be able to see how it's exchanged throughout the different pages, without reloading the site.

Product counter (optional)
We can also add a product counter in the shopping cart. For this we will use events and listeners of the Livewire components. The logic behind this functionality is to issue notifications every time a new product is added to the shopping cart and every time it is removed. We need a component to listen to those events and updates when it does.
To do this, we’ll need to modify our project a little bit, the first thing we will do is create a new header component
php artisan make:livewire Header
We modify the generated files in the following way:
<?php

namespace App\Http\Livewire;

use Illuminate\View\View;
use Livewire\Component;
use App\Facades\Cart;

class Header extends Component
{
    public $cartTotal = 0;

    protected $listeners = [
        'productAdded' => 'updateCartTotal',
        'productRemoved' => 'updateCartTotal',
        'clearCart' => 'updateCartTotal'
    ];

    public function mount(): void
    {
        $this->cartTotal = count(Cart::get()['products']);
    }

    public function render(): View
    {
        return view('livewire.header');
    }

    public function updateCartTotal(): void
    {
        $this->cartTotal = count(Cart::get()['products']);
    }
}
app/Http/Livewire/Header.php
<div>
    <nav class="flex items-center justify-between flex-wrap p-6 mb-6 shadow">
        <div class="block lg:hidden">
            <button class="flex items-center px-3 py-2 border rounded text-teal-200 border-teal-400 hover:text-white hover:border-white">
                <svg class="fill-current h-3 w-3" viewBox="0 0 20 20" xmlns="http://www.w3.org/2000/svg"><title>Menu</title><path d="M0 3h20v2H0V3zm0 6h20v2H0V9zm0 6h20v2H0v-2z"/></svg>
            </button>
        </div>
        <div class="w-full block flex-grow lg:flex lg:items-center lg:w-auto">
            <div class="text-sm lg:flex-grow">
                <a href="/" data-turbolinks-action="replace" class="block mt-4 lg:inline-block lg:mt-0 mr-4">
                    Home
                </a>
                <a href="/products" data-turbolinks-action="replace" class="block mt-4 lg:inline-block lg:mt-0 mr-4">
                    Products
                </a>
                <a href="/cart" data-turbolinks-action="replace" class="block mt-4 lg:inline-block lg:mt-0 mr-4">
                    Cart({{ $cartTotal }})
                </a>
            </div>
        </div>
    </nav>
</div>
resources/views/header.blade.php
Now what’s left is modifying our layout, substituting the header with the new component header we just created.
<!DOCTYPE html>
<html>
    <head>
        ..
    </head>
    <body>
        @livewire('header') // Before @include('layouts.header')
        ..
        <script src="{{ asset('js/app.js') }}"></script>
    </body>
</html>
resources/views/layouts/app.blade.js
We don't need the file we were including in the header anymore because we’re now using our component, so we can delete the file.
Now we must modify the function that adds and removes products from the shopping cart. We’ll modify app/Http/Livewire/Products.php y app/Http/Livewire/Cart.php respectively.
public function addToCart(int $productId): void
{
    Cart::add(Product::where('id', $productId)->first());
    $this->emit('productAdded');
}
app/Http/Livewire/Product.php
public function removeFromCart($productId): void
{
    CartFacade::remove($productId);
    $this->cart = CartFacade::get();
    $this->emit('productRemoved');
}

public function checkout(): void
{
    CartFacade::clear();
    $this->emit('clearCart');
    $this->cart = CartFacade::get();
}
app/Http/Livewire/Cart.php
Conclusions
One of Livewire’s best advantages is the possibility to construct user interfaces with PHP’s simplicity. It would be much complex to build the same thing using javascript and would require more learning and development time.
I guess that another amazing advantage is the possibility of using all the resources Laravel Core provides us in Livewire’s class components. This unifies both environments.
Livewire came here to stay, willing to set an ecosystem in which backend developers feel free to implement solutions with PHP in both, frontend and backend.
Repository: https://github.com/Light-it-labs/laravel-livewire-cart
We're Laravel Experts!
Do you have a Laravel project and need development services or an extra hand? Let's partner up! At Light-it, we offer Laravel Development & Staff Augmentation Services. Psst...We're the best at what we do... we've been recognized by Clutch as part of the TOP 30 Laravel Developers Worldwide.