How to Develop an App Idea and Make it Real
I know what you’re feeling right now. It’s the mixture of excitement, anxiety and frustration you get when you know you have an amazing idea but have no clue about how to start your own app. The good news is you’re in the right place!
In this post, we will explain to you the steps you should follow if you want to turn your idea into a real and money-making app. The details are throughout the article, but here’s a shortlist to sort your expectations:
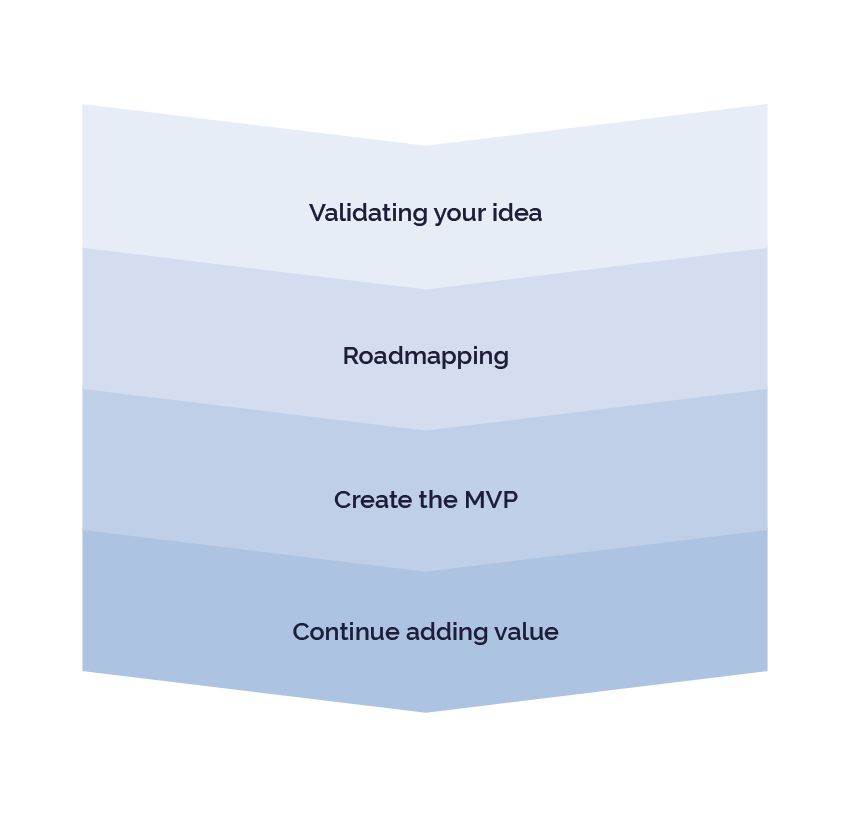
- The first step is “passing your idea through” a series of filters that follow The Lean Validation methodology, in order to validate it and make sure you’re not wasting your time and money.
- After validating and planning your idea, if you have no idea about app development, you will need to find someone to roadmap your project (we’ll explain this concept later in the article). There are many alternatives with different pros and cons as to who should roadmap your project, but don’t worry, the article will help you choose the more accurate one.
- After the roadmap is done, it’s time for the developer to create the Minimum Viable Product (we’ll also get to this in the article).
- After launching the MVP you should evaluate its performance and get feedback, from early users. Depending on these results and feedback, you will continue developing new features and making modifications.
Inventing an app isn’t an easy job, but don’t lose your enthusiasm! If you have a good idea and you’re motivated, being an amateur won’t necessarily stop you, but you’ll need to investigate and plan. The key to success doesn’t rely only on the idea, it mostly relies on knowing how to execute it.
How to Develop an App Idea
1. Filters
The first step to take is to evaluate if your idea is viable. You probably think it is but… have you thought this through?
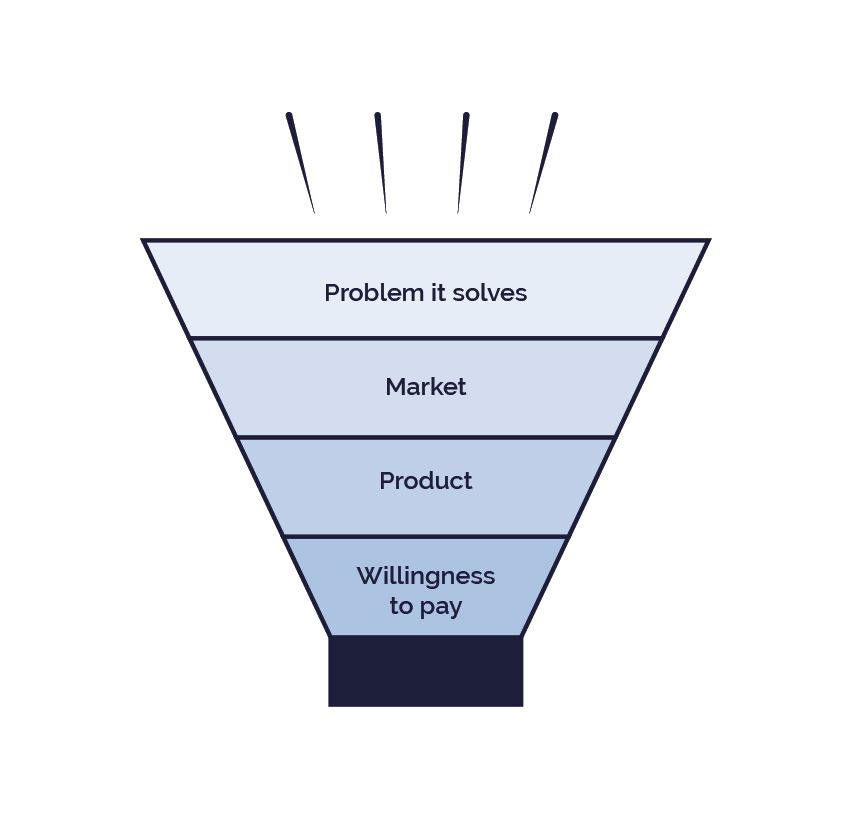
To do this, the Lean Validation Methodology presents four distinct stages of validation: the problem it solves, the market, the product, and the willingness to pay. To validate the idea, you should “pass it through” these stages, which work as filters and will help you to either ratify, modify, or discard your idea. It’s a way of confirming that your idea isn’t just good; it’s also viable and will effectively perform. If the idea fails at any stage, it doesn’t mean you should toss it away; the importance of validating comes with helping you figure out ways of modifying the original idea for it to perform.
About the problem it solves:
First, you can ask yourself some questions. What problem does this app solve? Do you think there is an important amount of people who have that problem? Find out. Search if there’s a real market, you can find the demographic data in your country’s census results. If there’s a significant group of people in your target audience… Would they use the app? Is it really necessary for them?
There are different ways to validate the idea in this stage. The key is to focus on user research, this will help you confirm the problem you're dealing with isn’t just a problem for you, and that what you find an ideal solution is what the others are looking for too.
It’s important to dialogue with potential users. This is not your family, friends and co-workers, they are not the ones who will be using your app. Okay, maybe they are, but they are biased, just like you, and they will support you and tell you whatever you want to hear. You need to delimitate your target audience and ask them for feedback. This is not asking “would you use this app?”, people will answer they will.
To get this feedback there are several techniques. One is, for example, the interview. Sitting down with a potential user and learning about him, his problem, past experiences, how he tried to solve it and the outcome, what he would appreciate as a user, etc. It’s important to know what they want, but you should not ask them directly, instead ask them for motivations behind what they want.
Other techniques:
- Ethnography research
- Surveys
- Find-5-people-who-are-in
About the market:
By talking to possible users, you confirm that people with your problem really exist. But, how many are they? You need to make sure there’s a significant number of people who would use your app for it to be profitable.
How large should the market be? That depends on the product and target. There are micro-marketing projects with very good revenue. It really depends on your aspirations and the specifics. Apps don’t have to be massive to be successful, you don’t have to be Uber, Facebook or Amazon to be profitable.
To delimitate and understand the market you should research for sibling markets and analyze their volume and characteristics. You may consider that your product is so innovative that you are creating a new market; this is possible, but not likely, so look deep into it. You should make exhaustive competitor research, not only for direct competitors, but also for similar products and solutions. Get to know them in-depth: their team, their office, their business model, media, pricing, features...
There are different tools you can use to validate the market such as Google Trends or Google Adwords Planner. You may also, for example, create a pretotype. This concept follows the notion of “fake it before making it”. In this case you could, for example, build a simple and standard webpage that promises the solution you want to develop but without actually having the solution. This way, you can measure and even get data about the people who entered to that web. This is a way of delimiting the market.
About the product:
It’s time to validate your idea and for that, you will need to build a prototype, even if it’s a handcrafted one. But first, you need to shape your ideas.
Write down a brief explaining everything about the app. Start with the basics and continue diving more and more deep. Firstly, include the problem it solves, how it is solved, and the target audience. Then go deeper, think of the specifics, everything you would like the app to have. Include every feature, benefit, attribute, innovative things that would give your app real and new value for the final consumer.
Don’t forget to include the business model. Somehow, your app will need to make money. For example, will the app be charged? Here are the different monetizing methods:
- Paid app: The user needs to pay (on AppStore / Google Play if it’s a mobile app or in the app if it’s web) in order to download/use the app.
- In-App purchases: Downloading/using the App is free, but there is a paid option that unlocks extra features/levels. (For example, in a game, you can buy extra lives or game-money).
- In-app advertising: This is the most popular way of monetizing an app. It’s quite simple, an advertiser with a similar target audience sets an ad on your app and you, app owner, get money for the number of impressions or clicks the ad had. The amount of money also depends on the type of ad, it can be a banner, a video, a pop-up, etc.
- Subscription: The app is free and part of the content is also, but users can subscribe (paying monthly/per year) and get access to an unlimited version of the app, or to some other content only available for subscribers. This is, for example, the case of Spotify and Netflix.
- Sponsorship: In this case, the app is yours but you label it to match a sponsor’s brand. The sponsor pays.
- Freemium: There are two versions of the app, a free one and a paid one. If users like the free one, they may want to upgrade and buy the paid version.
After shaping your ideas it’s time to materialize them. The good news is that you don’t need to be a tech genius to build a prototype. We’re all app users and we know how they usually work, so grab some markers, blank pages and start building your wireframe. A wireframe is basically a visual guide that illustrates the skeletal framework of the app. The importance of the wireframe is including the features listed in the brief with their hierarchy, without focusing on the graphic and design elements. It’s simple, you need to plan and illustrate (a simple drawing is okay) every feature you wrote down at the brief. Just grab a pen and design the app. Create simple sketches: “If you click here, it takes you here”. Sketches may help you materialize your ideas, find out if they are viable, understandable.
It doesn’t matter if you have no clue about engineering, just plan and organize your ideas in order to present them to someone who does know how to create the app.
The main objective of this step is not designing a final version, someone else will do that for you. The objective is for you to order your ideas and visualize them in a clearer way. Then it will be easier for you to transmit your ideas to the developers and marketers.
I also recommend you to build a mockup. This is in some way an “upgraded version” of the wireframe. A mockup will be a neat representation of the app, it may or may not be functional, this doesn’t mean it really works, it’s a demonstration of how it would work. There are different tools you can use to build mockups, they’re really simple so again, you don’t have to be an engineer to use them. Some of them are Sketch (to do wireframes) & Invision (to convert the Sketch wireframes into mockups), Adobe XD or Balsamiq.
About the willingness to pay:
People said they’re willing to use your app, but are they willing to pay for it? We can’t trust people’s words when a whole project is on the line. There are different methods you can use to validate the willingness to pay.
A good one is creating a simple site, as the pretotype one I mentioned before, with a “buy” call to action. Of course, you won’t be really charging, when people try to buy you’ll let them know the feature is not available yet, but you’ll be getting the information about all these people who are actually willing to pay for your solution. You should measure the total of “sales” and understand where they come from. Another interesting variable is the “cart abandonment rate”, that measures the number of people who started the buying process but for some reason didn’t finish it.
You can also ask directly to potential users if they would pay in advance for your solution, before it’s fully developed. If they do, it means you have real potential consumers. If they don’t, you should dig deeper to find out why and if they will really pay for the app when the app is in the market (of course this depends on your business model, that may or may not involve a payment).
2. Roadmapping

Your plan is ready and this means it’s time to make it real, so in case you’re not an App Developer, you should be curious about this part. Your developer will start with roadmapping your project. Roadmapping is the strategic process of defining the actions and resources needed to take an initiative from vision to reality. Who can roadmap and develop my app? There are different alternatives, each with pros and cons.
Here are some:
- Hiring a Software Development Agency: this is probably one of the best alternatives. If you hire an agency, you will have people with different specializations and focuses working on your project, this means each part of your app will meet professional standards. In addition, having the backup of an agency is safer than hiring a freelancer.
You can choose to hire a US-based agency or agencies based in other countries. Both options work perfectly. You may think that hiring someone in the US is simpler and safer, but the truth is that prices tend to be much higher. Developing with a US-based agency is a good alternative, but it is also the most expensive one and this doesn’t even mean better quality. That’s why you may want to take into consideration hiring an agency based in another country. There are many serious agencies around the world, with good professionals developing high-quality software. In this case, you’ll be developing your app at a significant lower price without losing quality. Many times even US-based agencies outsource to other countries.
However, you shouldn’t go hire the first agency you find only because it’s cheap. You should definitely do your research, check out their past products and evaluate if they are good, talk to them, find out if their mindset and yours meet, etc.
Another important thing to take into account is communication. The good news is that nowadays, with amazing technologies such as Slack or Skype, communicating is really easy. However, If you’re hiring an agency from another country, schedule calls and make sure their English is good. Also, check if the agency’s timezone and yours are similar; an agency is a partner and you’ll be working side-by-side with them, you don’t want them to have a totally different time zone. This doesn’t mean you can’t work with agencies from other countries, for example, Uruguay and New York only have one hour difference, while New York and LA have 3.
Concluding, if you are looking forward to hiring an agency, investigate the different proposals, compare them in price, quality of their past work, communication and compromise, and don’t be afraid to take into consideration agencies from other countries. - Hire a freelancer: You can find freelancers in the US or in other countries, they tend to be cheaper than agencies (prices depend also in where they are located) but are less trustworthy as they don’t have company backing. If you are thinking about hiring a freelancer, I strongly recommend you to find out previous clients of the developer and ask them for feedback on his work.
- Find a technical co-founder. This is finding someone who is willing to invest his time and knowledge in your app, without receiving money for the development, but expecting to earn money once the app is launched and billing. The truth is it’s not easy to find someone that will agree to those terms, but it’s not impossible. A technical co-founder must be someone really passionate and motivated by your idea, someone with commitment and time to invest. He should be as convinced of the potential of the app as you are. The best way of finding a technical co-founder is in your existing network: co-workers, entrepreneurs, friends or friends of friends! How to split the revenue? That depends on the deal you make with your partner. This is a great alternative, but it’s not always a possibility.
Which one should I choose? Only you can decide that. You should take into consideration your budget, the risks you’re willing to take, the profile and experience of the agencies/developers, the tools they use, their working methodology, the style that’s more suitable for you, etc. The best advice I can give you is to investigate every alternative and getting to know deeply the agency/developer before taking a decision. Take into account that whoever you choose will be your partner for a long time, so it’s important to work with someone who really understands what you want and is looking forward to working side-by-side with you.
3. Developing the MVP
MVP goes for Minimum Viable Product. It’s a central concept in the LEAN approach and it refers to a first version of the product. The MVP is a functioning version of the app that has the fundamental features only. Apart from making actual money (or not, that depends on the strategy you choose when launching the MVP), you’ll be collecting relevant information about users by observing their behavior. So the MVP has two main purposes: on the one hand satisfying the most important needs of the users, and on the other hand, obtaining valuable information and feedback on these early consumers. Failing early is succeeding, finding mistakes and insights in the MVP, is cheaper than finding them out after developing an app with a bigger scope.
It’s a common mistake to think that the MVP and the prototype (in the validation instance) are the same, but they are very different. Even though both collect information on the users, the main difference is that while the MVP is an actual working app with real value for the user, the prototype is a sketch, a really cheap and easy way of representing the product that doesn’t actually function yet. This means that the MVP requires a much larger investment of money and time, that’s why it is done in a later instance.
4. Continue adding value!
Now yes. You have confirmed that your app solves a real problem, with a viable solution and a potential market, with people willing to pay. You planned, sketched and validated the features. You investigated the different alternatives of developers and chose the more suitable one for you and your project. The developer made a roadmap and you agreed with it, so he started working on the MVP in order to finally launch the app and also getting new insights and save money. You launched the MVP, gathered all the information you acquired from it and analyzed it.
Now it’s time to, taking into account the results of the MVP, make some changes (if necessary) and add the missing/new features. Always take into consideration the value they will add to users, remember the main objective is adding value as soon as possible. An app is never fully finished, they’re in constant development, so you should always look forward to evolve.
5. Others
I have an app idea, where do I start? Well, there are many other important concepts you will need to take into account if you’re going to create an app such as finance, Marketing, Analytics, measuring success, human resources, legal advice, etc. Don’t forget that creating an app is creating a business. So, if you’re interested in any of these concepts, please leave us a comment below telling us which one so that we write a new post explaining it. And if you’re looking for App Development, drop us a line! We’re a quality digital product studio and we’ll be happy to discuss your awesome idea.